How to Plan Removable Flood Barriers for Facility Entrances
A removable flood barrier is most useful when it is treated as part of an entrance-protection plan, not as a last-minute purchase. Warehouses, workshops, car parks, loading areas and public buildings can all have low points where surface water reaches a doorway or access route before the rest of the site. Selecting the right barrier begins with understanding how water is likely to arrive, how quickly the opening must be closed and what must remain accessible during an incident.
Map the route of water before choosing a barrier
Start with the site, not the catalogue. Record the width of each opening, threshold level, floor slope, drainage position and nearby kerbs or walls. Review previous flooding, local rainfall patterns and any upstream surfaces that can concentrate runoff. A barrier placed at the doorway may be too late if water can enter through a side passage, service opening or loading bay.
The intended protection level should be established by the site owner or a qualified flood-risk professional. Temporary entrance barriers can help manage shallow surface-water routes, but they do not replace structural waterproofing, drainage design or an engineered flood-protection system where water depth, pressure or duration may be significant.
Compare dimensions with the actual opening
Barrier height, length and footprint affect both protection and usability. A higher unit may provide more freeboard, but it can also be heavier, require more storage space and create a larger obstruction. Measure the clear width and check whether several modules, end connections or supporting surfaces are needed to cover the complete route.
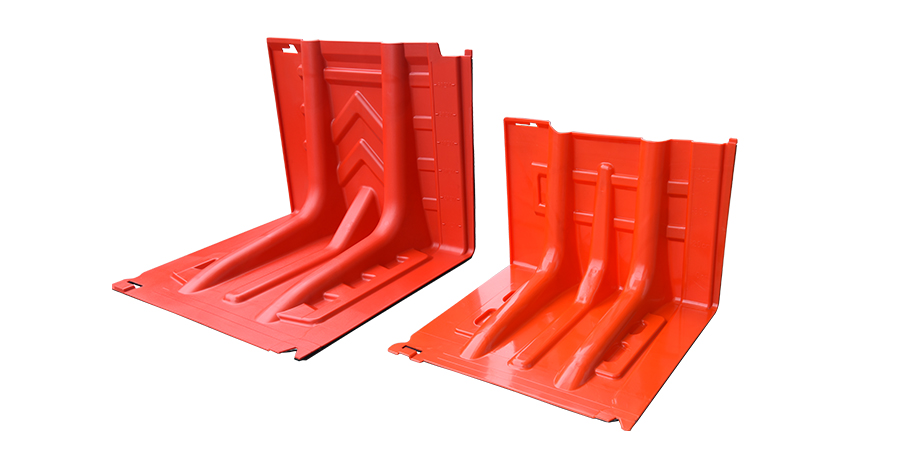
EastSea lists two removable flood barrier sizes for comparison: model DH-RFB-1 at 705 × 680 × 528 mm and model DH-RFB-2 at 1000 × 850 × 750 mm (length × width × height). Buyers should confirm the required arrangement, connection details and site conditions with EastSea before ordering rather than assuming that one published dimension determines the full installation.
Pay attention to the ground and side interfaces
Water commonly finds the smallest low point. Uneven paving, expansion joints, debris, damaged thresholds and gaps beside walls can reduce the effectiveness of a temporary barrier. Inspect the contact surfaces and define how they will be cleaned before deployment. If sealing elements or accessories are part of the proposed configuration, confirm their compatibility with the surface and the expected water conditions.
Also consider pedestrian and vehicle movement. The stored barrier must be close enough for rapid deployment, but the deployed arrangement should not create an unmanaged trip hazard or block an emergency route. The site response plan should state who may close the opening and how alternative access will be maintained.
Design a deployment routine crews can repeat
A flood barrier that has never been practised may take too long to install when weather deteriorates. Run a dry deployment with the actual team. Mark the storage position, transport route and installation order; identify any tools or accessories; and record a realistic setup time. Photograph the correct finished arrangement so that different shifts can reproduce it.
After the exercise, check whether one person can safely handle each component, whether the path remains clear and whether lighting is sufficient for night deployment. Rehearse removal as well: trapped water should be released in a controlled way, and wet components need a cleaning and drying area before storage.
Inspection and maintenance
Before the wet season and after every use, inspect the barrier body, contact edges, connectors and any sealing parts for damage, distortion or contamination. Clean using methods suitable for the product material, allow components to dry and store them away from impacts or loads that could change their shape. Keep accessories together and replace missing or damaged parts before the next warning.
A simple inspection log should record the date, condition, responsible person and any corrective action. It is also good practice to repeat the deployment drill after staff changes, building work or modifications to drainage and access routes.
Information to include in an enquiry
- Opening width, threshold profile and clear photographs of the installation area
- Expected water direction, depth and likely duration
- Required deployment time and number of available staff
- Surface material, level differences and nearby walls or kerbs
- Storage, handling and alternative-access requirements
- Quantity, preferred model and any connection or accessory needs
EastSea’s Removable Flood Barrier gives facility managers, distributors and contractors a practical starting point for temporary entrance protection. Send EastSea the opening dimensions, site photos, expected water conditions and required quantity so the available options can be reviewed against the real application.